Welcome to the third article in this series, which covers the process to prepare and run computer vision models at the edge. The complete list of articles that compose the series are listed below:
- How to install single node OpenShift on AWS
- How to install single node OpenShift on bare metal
- Red Hat OpenShift AI installation and setup
- Model training in Red Hat OpenShift AI
- Prepare and label custom datasets with Label Studio
- Deploy computer vision applications at the edge with MicroShift
Introduction
Red Hat OpenShift AI is a comprehensive platform designed to streamline the development, deployment, and management of data science and machine learning applications in hybrid and multi-cloud environments. Leveraging the Red Hat OpenShift app dev platform, OpenShift AI empowers data science teams to exploit container orchestration capabilities for scalable and efficient deployment.
In this tutorial, we will prepare and install the Red Hat OpenShift AI operator and its components. This includes enabling the use of GPU and the storage configuration. The next article in this series will cover how to use the operator for AI model training.
LVM storage installation
OpenShift AI will require some storage when creating workbenches and deploying notebooks. Therefore, one of the prerequisites will be to install the Logical Volume Manager Storage (LVMS) operator on our single node OpenShift (SNO). LVMS uses Linux Logical Volume Manager (LVM) as a back end to provide the necessary storage space for OpenShift AI in our SNO.
Note
LVMS requires an empty dedicated disk to provision storage. To ensure that the operator can be installed and used, make sure you already have an empty disk available.
The easiest and most convenient way to install the operator is via the OpenShift web console:
- In your SNO web console, navigate to the Operators section on the left-hand menu.
- Select OperatorHub. This will show the marketplace catalog integrated in Red Hat OpenShift Container Platform (OCP) with the different operators available.
- In the search field, type
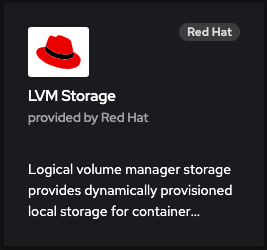
LVMS. - Select the LVM Storage operator (Figure 1) and click Install on the right side of the screen.

- Once in the configuration page, we can keep the default values. Press Install again.
- Wait a little while the installation finishes. Then, press the Create LVMCluster button that just appeared.
- In the configuration form you can change some of the parameters, like the instance name, device class, etc. Check the default box under storage > deviceClasses to use
lvms-vg1as the default storage class. - Press the Create button to start the custom resource creation.
You can wait for the Status to become Ready, or check the deployment process from the command line. In the Terminal connected to your SNO, run the following command:
watch oc get pods -n openshift-storageWait until you see all pods running:
NAME                                        READY         STATUS     RESTARTS      AGE
lvms-operator-5656d84f77-ntlzm              1/1           Running    0             2m45s
topolvm-controller-7dd48b6556-dg222         5/5           Running    0             109s
topolvm-node-xgc79                          4/4           Running    0             87s
vg-manager-lj4kd                            1/1           Running    0             109s
And just like that, you've deployed the first operator. But this is only the beginning. Let’s continue with the next step, to configure the node for GPU detection.
Node Feature Discovery installation
Now, let's focus on configuring our node so the GPU can be detected. Red Hat’s supported approach is using the NVIDIA GPU Operator. Before installing it, there are a couple of prerequisites we need to meet.
The first one is installing the Node Feature Discovery Operator (NFD). This operator will manage the detection and configuration of hardware features in our SNO. The process will be quite similar to the one we just followed.
- In the web console, locate the Operators section on the left menu again.
- Click OperatorHub to access the catalog.
- Once there, type
NFDin the text box. We will get two results. - In this case, I will install the operator that is supported by Red Hat (Figure 2). Click Install.

- This will prompt us to a second page with different configurable parameters. Let’s keep the default values and press the Install button.
- This will trigger the operator installation. Once finished, press View Operator.
- Under the NodeFeatureDiscovery component, click Create instance.
- As we did before, keep the default values and click Create. This instance proceeds to label the GPU node.
Verify the installation by running the following command in your terminal:
watch oc get pods -n openshift-nfdWait until all the pods are running:
NAME                                          READY         STATUS     RESTARTS      AGE
nfd-controller-manager-7758f5d99-9zpjw        2/2           Running    0             2m4s
nfd-master-798b4885-4qfhq                     1/1           Running    0             10s
nfd-worker-7gjhv                              1/1           Running    0             10s
The Node Feature Discovery Operator uses vendor PCI IDs to identify hardware in our node.
0x10deis the PCI vendor ID that is assigned to NVIDIA, so we can verify if that label is present in our node by running this command:oc describe node | egrep 'Labels|pci'There, you can spot the
0x10detag present:Labels: beta.kubernetes.io/arch=amd64 feature.node.kubernetes.io/pci-102b.present=true feature.node.kubernetes.io/pci-10de.present=true feature.node.kubernetes.io/pci-14e4.present=true
The Node Feature Operator has been installed correctly. This means that our GPU hardware can be detected, so we can continue and install the NVIDIA GPU operator.
NVIDIA GPU Operator installation
The NVIDIA GPU Operator will manage and automate the software provision needed to configure the GPU we just exposed. Follow these instructions to install the operator:
- Again, navigate to Operators in the web console.
- Move to the OperatorHub section.
- In the search field, type
NVIDIA. Select the NVIDIA GPU Operator (Figure 3) and press Install.

Figure 3: After searching NVIDIA, select the NVIDIA GPU operator that will populate in the search results. - It’s not necessary to modify any values. Click Install again.
- When the operator is installed, press View Operator.
- You can create the operand by clicking Create instance in the ClusterPolicy section.
- Skip the values configuration part and click Create.
While the ClusterPolicy is created, we can see the progress from our terminal by running this command:
watch oc get pods -n nvidia-gpu-operatorYou will know it has finished when you see an output similar to the following:
NAME                                                     READY     STATUS         RESTARTS      AGE
gpu-feature-discovery-wkzpf                              1/1       Running        0             15d
gpu-operator-76c4c94788-59rfh                            1/1       Running        0             15d
nvidia-container-toolkit-daemonset-5t5dp                 1/1       Running        0             15d
nvidia-cuda-validator-m5x4k                              0/1       Completed      0             15d
nvidia-dcgm-8sn57                                        1/1       Running        0             15d
nvidia-dcgm-exporter-hnjc6                               1/1       Running        0             15d
nvidia-device-plugin-daemonset-467zm                     1/1       Running        0             15d
nvidia-device-plugin-validator-bqfr6                     0/1       Completed      0             15d
nvidia-driver-daemonset-412.86.202301061548-0-kpkjp      2/2       Running        0             15d
nvidia-node-status-exporter-6chdx                        1/1       Running        0             15d
nvidia-operator-validator-jj8c4                          1/1       Running        0             15d
We have just completed the GPU setup. At this point, we will be able to select our GPU to be used in the model training. There is one last thing we need to take care of before installing OpenShift AI: enabling the Image Registry Operator.
Enable Image Registry Operator
On platforms that do not provide shareable object storage, like bare metal, the OpenShift Image Registry Operator bootstraps itself as Removed. This allows OpenShift to be installed on these platform types. OpenShift AI will require enabling the image registry again in order to be able to deploy the workbenches.
In your Terminal, ensure you don't have any running pods in the
openshift-image-registrynamespace:oc get pod -n openshift-image-registry -l docker-registry=defaultNow we will need to edit the registry configuration:
oc edit configs.imageregistry.operator.openshift.ioUnder
storage: { }, include the following lines, making sure you leave the claim name blank. This way, the PVC will be created automatically:spec: ... storage: pvc: claim:Also, change the
managementStatefield fromRemovedtoManaged:spec: ... managementState: Managed- The PVC will be created as
Shared access (RWX). However, we will need to useReadWriteOnce. Back in the Web Console, go to the Storage menu. - Navigate to the PersistentVolumeClaims section.
- Make sure you have selected Project: openshift-image-registry at the top of the page. If you cannot find it, enable the Show default namespaces button.
- You will see the image-registry-storage PVC as Pending. The PVC cannot be modified, so we will need to delete the existing one and recreate it modifying the accessMode. Click on the three dots on the right side and select Delete PersistentVolumeClaim.
- It’s time to recreate the PVC again. To do so, click Create PersistentVolumeClaim.
- Complete the following fields as shown and click Create when done:
- StorageClass:
lvms-vg1 - PersistentVolumeClaim name:
image-registry-storage - AccessMode:
Single User (RWO) - Size:
30 GiB - Volume mode:
Filesystem
- In a few seconds, you will see the PVC status as Bound (Figure 4).

With this last step, you have installed and configured the necessary infrastructure and prerequisites for Red Hat OpenShift AI.
Red Hat OpenShift AI installation
Red Hat OpenShift AI combines the scalability and flexibility of containerization with the capabilities of machine learning and data analytics. With OpenShift AI, data scientists and developers can efficiently collaborate, deploy, and manage their models and applications.
You can have your OpenShift AI operator installed and working in just a couple of minutes:
- From the web console, navigate back to the Operators tab and select OperatorHub.
- Type
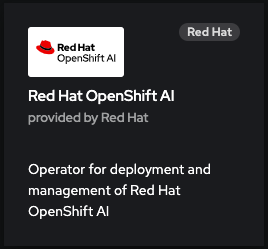
OpenShift AIto search the component in the operators' catalog. - Select the Red Hat OpenShift AI operator (Figure 5) and click Install.

- The default values will already be configured so we will not need to modify any of them. To start the installation press the Install button again.
- Once the status has changed to Succeeded we can confirm that the operator deployment has finished.
- Now we need to create the required custom resource. Select Create DataScienceCluster.
- Keep the pre-defined values and press Create.
- Wait for the Phase to become Ready. This will mean that the operator is ready to be used.
- We can access the OpenShift AI web console from the OCP console. On the right side of the top navigation bar, you will find a square icon formed by 9 smaller squares. Click it and select Red Hat OpenShift AI from the drop-down menu, as shown in Figure 6.

- A new tab will open. Log in again using your OpenShift credentials (kubeadmin and password).
Welcome to the Red Hat OpenShift AI landing page (Figure 7). It is on this platform where the magic will happen, as you'll learn in the next article.

Video demo
The following video covers the process of installing Red Hat OpenShift AI on the single node, along with the underlying operators like Logical Volume Manager Storage (LVMS), Node Feature Discovery (NFD), and NVIDIA GPU.
Next steps
In this article, we have made use of different operators that are indispensable for the installation of Red Hat OpenShift AI. We started with the storage setup and ended with the GPU enablement, which will speed up the training process that we will see in our next article.
From here, we will move away from infrastructure and enter the world of artificial intelligence and computer vision. Check out the next article to keep learning about Red Hat OpenShift AI: Model training in Red Hat OpenShift AI.
Last updated: September 30, 2024