Redhat Developers  Logo
  • Products

    Featured

    • Red Hat Enterprise Linux
      Red Hat Enterprise Linux Icon
    • Red Hat OpenShift AI
      Red Hat OpenShift AI
    • Red Hat Enterprise Linux AI
      Linux icon inside of a brain
    • Image mode for Red Hat Enterprise Linux
      RHEL image mode
    • Red Hat OpenShift
      Openshift icon
    • Red Hat Ansible Automation Platform
      Ansible icon
    • Red Hat Developer Hub
      Developer Hub
    • View All Red Hat Products
    • Linux

      • Red Hat Enterprise Linux
      • Image mode for Red Hat Enterprise Linux
      • Red Hat Universal Base Images (UBI)
    • Java runtimes & frameworks

      • JBoss Enterprise Application Platform
      • Red Hat build of OpenJDK
    • Kubernetes

      • Red Hat OpenShift
      • Microsoft Azure Red Hat OpenShift
      • Red Hat OpenShift Virtualization
      • Red Hat OpenShift Lightspeed
    • Integration & App Connectivity

      • Red Hat Build of Apache Camel
      • Red Hat Service Interconnect
      • Red Hat Connectivity Link
    • AI/ML

      • Red Hat OpenShift AI
      • Red Hat Enterprise Linux AI
    • Automation

      • Red Hat Ansible Automation Platform
      • Red Hat Ansible Lightspeed
    • Developer tools

      • Red Hat Trusted Software Supply Chain
      • Podman Desktop
      • Red Hat OpenShift Dev Spaces
    • Developer Sandbox

      Developer Sandbox
      Try Red Hat products and technologies without setup or configuration fees for 30 days with this shared Openshift and Kubernetes cluster.
    • Try at no cost
  • Technologies

    Featured

    • AI/ML
      AI/ML Icon
    • Linux
      Linux Icon
    • Kubernetes
      Cloud icon
    • Automation
      Automation Icon showing arrows moving in a circle around a gear
    • View All Technologies
    • Programming Languages & Frameworks

      • Java
      • Python
      • JavaScript
    • System Design & Architecture

      • Red Hat architecture and design patterns
      • Microservices
      • Event-Driven Architecture
      • Databases
    • Developer Productivity

      • Developer productivity
      • Developer Tools
      • GitOps
    • Secure Development & Architectures

      • Security
      • Secure coding
    • Platform Engineering

      • DevOps
      • DevSecOps
      • Ansible automation for applications and services
    • Automated Data Processing

      • AI/ML
      • Data Science
      • Apache Kafka on Kubernetes
      • View All Technologies
    • Start exploring in the Developer Sandbox for free

      sandbox graphic
      Try Red Hat's products and technologies without setup or configuration.
    • Try at no cost
  • Learn

    Featured

    • Kubernetes & Cloud Native
      Openshift icon
    • Linux
      Rhel icon
    • Automation
      Ansible cloud icon
    • Java
      Java icon
    • AI/ML
      AI/ML Icon
    • View All Learning Resources

    E-Books

    • GitOps Cookbook
    • Podman in Action
    • Kubernetes Operators
    • The Path to GitOps
    • View All E-books

    Cheat Sheets

    • Linux Commands
    • Bash Commands
    • Git
    • systemd Commands
    • View All Cheat Sheets

    Documentation

    • API Catalog
    • Product Documentation
    • Legacy Documentation
    • Red Hat Learning

      Learning image
      Boost your technical skills to expert-level with the help of interactive lessons offered by various Red Hat Learning programs.
    • Explore Red Hat Learning
  • Developer Sandbox

    Developer Sandbox

    • Access Red Hat’s products and technologies without setup or configuration, and start developing quicker than ever before with our new, no-cost sandbox environments.
    • Explore Developer Sandbox

    Featured Developer Sandbox activities

    • Get started with your Developer Sandbox
    • OpenShift virtualization and application modernization using the Developer Sandbox
    • Explore all Developer Sandbox activities

    Ready to start developing apps?

    • Try at no cost
  • Blog
  • Events
  • Videos

How to use content templates in Red Hat Insights

April 23, 2025
Justin Sherrill
Related topics:
Linux
Related products:
Red Hat Enterprise Linux

Share:

    When managing a patching cycle for your systems, it is important to have a stable, reliable base of content. New errata and packages arrive frequently, and an update done on a Monday may be different than an update done on a Wednesday. Content templates utilize snapshots of Red Hat repositories and third-party repositories to enable administrators to control what software is available to install at the dnf/yum level. 

    What is a repository snapshot?

    A repository snapshot is a copy of a given Yum repository at a specific point in time. The core Red Hat repositories are snapshotted automatically every 24 hours. Custom repositories that you define in your account are also snapshotted every 24 hours once they have been defined. For example, all users already have the "Red Hat Enterprise Linux 9 x86_64 BaseOS" and "Red Hat Enterprise Linux 9 x86_64 Appstream" repositories available with daily snapshots.

    What is a content template?

    A content template is made up of snapshots of multiple repositories, including Red Hat software and optionally third-party software. Once a template is assigned to a system, that system will be configured to use those snapshots for updates instead of pulling the latest updates from the content delivery network (CDN). This provides similar, but simplified, functionality as the Red Hat Satellite content views.

    Create your first content template 

    For this example, you need a system registered to Red Hat Insights. If you do not have any systems registered to Red Hat Insights, run the following command on a Red Hat Enterprise Linux 9 or Red Hat Enterprise Linux 8 host:

    rhc connect

    For our first template, we will use Red Hat content and then later add custom content to it.

    To begin, navigate to Content Templates and select Add content template, as shown in Figure 1. 

    Empty template list
    Empty template list, clicking "Add Template" will lead you to the creation wizard
    Created by Justin Sherrill, License under CC BY 4.0.
    Figure 1: Empty template list, clicking Add Template will lead you to the creation wizard.

    Select the desired architecture and OS version from the lists (Figure 2).

    Define content step of template creation wizard
    Selecting the operating system version and architecture
    Created by Justin Sherrill, License under CC BY 4.0.
    Figure 2: The define template content step of the template creation wizard.

    Select any additional Red Hat repositories you need (Figure 3). The base set of Red Hat repositories required will be pre-selected. Additional Red Hat repositories will be added in the future. (We will cover how you can select custom repositories later.) Select Next. 

    Selecting additional Red Hat repositories
    This wizard steps allows you to select add-on Red Hat provided repositories to include in the template
    Created by Justin Sherrill, License under CC BY 4.0.
    Figure 3: Selecting additional Red Hat repositories.

    In Figure 4, you can choose to always use the latest snapshot of all selected repositories or pick a certain date. If you choose Use latest content, the snapshots used by this template will update whenever a new snapshot is taken. This could result in a template updated multiple times per day. By choosing a very specific date, the template’s snapshots will not change until the template is updated. Select a recent date, then click Next.

    Selecting between two options, always using the latest available snapshots, or selecting a specific date.
    By selecting a specific date, the content template will be frozen until the user changes the date.
    Created by Justin Sherrill, License under CC BY 4.0.
    Figure 4: Selecting between two options, always using the latest available snapshots, or selecting a specific date.

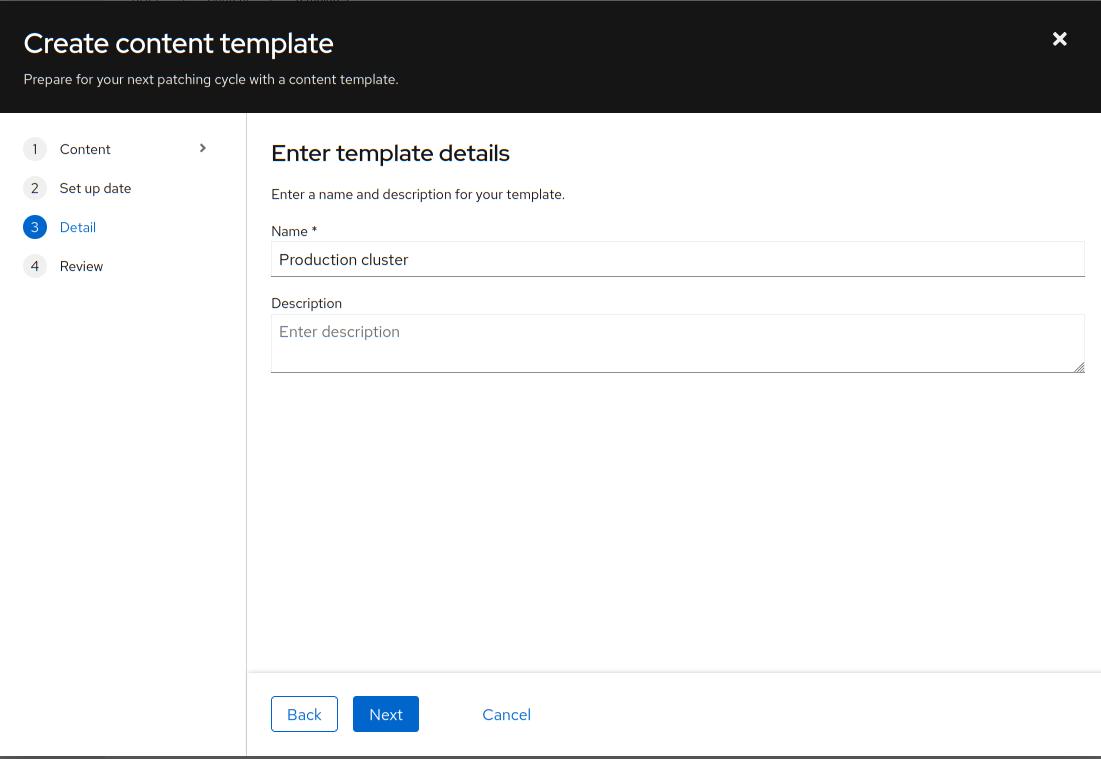
    Provide a name and description of the template. You might pick a name such as “Production web servers” or “Staging cluster”(Figure 5). Then click Next.

    Providing name and description of the template
    Created by Justin Sherrill, License under CC BY 4.0.
    Figure 5: Providing a name and description of the template.

    In this step, you can review all of your choices. If everything looks correct, select Create template and add to systems (Figure 6).

    Reviewing the details of the template
    Created by Justin Sherrill, License under CC BY 4.0.
    Figure 6: Reviewing the details of the template.

    Assign a template to the system

    You should see your system in the list. Select it and click Assign, as shown in Figure 7.

    Selecting systems to assign template
    Created by Justin Sherrill, License under CC BY 4.0.
    Figure 7: Selecting systems to assign template.

    Your system will pick up this template at the next Red Hat Subscription Management check-in, but we can force it by running the following command:

    # subscription-manager refresh

    If we examine the /etc/yum.repos.d/redhat.repo file, we will see it is using snapshots from https://cert.console.redhat.com for updates instead of pulling the latest from https://cdn.redhat.com/:

    # cat /etc/yum.repos.d/redhat.repo
    [rhel-9-for-x86_64-appstream-rpms]
    name = Red Hat Enterprise Linux 9 for x86_64 - AppStream (RPMs)
    baseurl = https://cert.console.redhat.com/api/pulp-content/ccac33ac/templates/d899b942-d1a8-4efe-b77e-ae11d7392e50/content/dist/rhel9/$releasever/x86_64/appstream/os
    enabled = 1
    gpgcheck = 1
    gpgkey = file:///etc/pki/rpm-gpg/RPM-GPG-KEY-redhat-release
    sslverify = 1
    sslclientkey = /etc/pki/entitlement/5528414123604440820-key.pem
    sslclientcert = /etc/pki/entitlement/5528414123604440820.pem
    metadata_expire = 86400
    enabled_metadata = 1
    sslverifystatus = 0
    [rhel-9-for-x86_64-baseos-rpms]
    name = Red Hat Enterprise Linux 9 for x86_64 - BaseOS (RPMs)
    baseurl = https://cert.console.redhat.com/api/pulp-content/ccac33ac/templates/d899b942-d1a8-4efe-b77e-ae11d7392e50/content/dist/rhel9/$releasever/x86_64/baseos/os
    enabled = 1
    gpgcheck = 1
    gpgkey = file:///etc/pki/rpm-gpg/RPM-GPG-KEY-redhat-release
    sslverify = 1
    sslclientkey = /etc/pki/entitlement/5528414123604440820-key.pem
    sslclientcert = /etc/pki/entitlement/5528414123604440820.pem
    metadata_expire = 86400
    enabled_metadata = 1
    sslverifystatus = 0

    To summarize, we have defined a content template with Red Hat content frozen to a specific date, assigned it to a system, and observed the system using this template for updates. 

    Add custom content

    Next let's add custom RPM content to our template. Once we have defined a third-party repository or uploaded RPMs to a repository, we can use that repository in a template in the same manner as a Red Hat one.

    Third-party repository snapshot

    To snapshot third-party repositories, head to the Repositories application. Click Add Repositories and select the Snapshotting repository type. Note that you can easily add Extra Packages for Enterprise Linux (EPEL) repositories from the Popular Repositories tab (Figure 8).

    Create repository modal, repository type set to "Snapshotting"
    Created by Justin Sherrill, License under CC BY 4.0.
    Figure 8: Create a repository modal, repository type set to "Snapshotting".

    Give the repository a name and fill in the URL with the http(s) URL to the remote repository. If you include a GPG key, systems will use that GPG key to validate the RPMs when installing them. Saving it will start the snapshotting process. If this is a large repository such as EPEL, this can take some time. You can monitor the progress on the repository list page in the Status column, as depicted in Figure 9.

    Repository list showing a "Pending" status
    Created by Justin Sherrill, License under CC BY 4.0.
    Figure 9: The repository list shows a pending status.

    Upload custom RPMs

    Content templates also support repositories with uploaded RPMs. These can be RPMs your organization creates or third-party RPMs that aren’t publicly available to snapshot.

    To upload RPMs, go to the Repositories application by click the Add Repositories button, as previously shown in Figure 9.

    In figure 10, you will provide a name, select the upload type, and click Save and upload content. The repository will be created and allow you to either drag and drop RPM files or use the browser’s file picker to select RPMs to upload (Figure 10). 

    Create repository modal, showing repository type being set to "Upload"
    Created by Justin Sherrill, License under CC BY 4.0.
    Figure 10: Create repository modal, showing repository type being set to "Upload".

    After adding one or more files, the browser will start processing and uploading the files. This can take a while for large files or slow connections (Figure 11).

    Upload modal allowing the user to drag  and drop one or more files or use the browser file dialogue box to select one or more files.
    Created by Justin Sherrill, License under CC BY 4.0.
    Figure 11: This screen shows the processing of file uploads.

    Once the upload is complete, select Confirm changes (Figure 12).

    A file has been selected, the transfer completed showing a green progress bar.
    Created by Justin Sherrill, License under CC BY 4.0.
    Figure 12: When the transfer completes, a green progress bar appears.

    Once complete, the process of creating the repository snapshot will start. You can monitor the progress in the repository list, as shown in Figure 13.

    Repository list showing a snapshot in progress from an uploaded RPM.
    Created by Justin Sherrill, License under CC BY 4.0.
    Figure 13: The repository list showing a snapshot in progress from an uploaded RPM.

    Add custom content to the template

    Now head back over to the Templates list shown in Figure 14. Locate your template. Click the kebab menu to the right of the template name and select Edit. 

    Template list
    Created by Justin Sherrill, License under CC BY 4.0.
    Figure 14: Template list.

    Select Custom Repositories in Figure 15.

    Editing the template
    Created by Justin Sherrill, License under CC BY 4.0.
    Figure 15: Locate Custom Repositories in the menu to the left.

    Select one or more custom repositories you would like to add to the template, as shown in Figure 16.

    Selecting one or more custom repositories to add to the template.
    Figure 16: Selecting one or more custom repositories to add to the template.
    Created by Justin Sherrill, License under CC BY 4.0.
    Figure 16: Selecting one or more custom repositories to add to the template.

    Click Next three times until you are at the final review step, then select Confirm Changes. 

    Note that it can take up to a minute for these changes to take effect. You can monitor with the Status column of the template list.

    Now at the next check-in, the system will pick up the changes to the template. You can force this by running subscription-manager refresh.

    To see the custom repositories, run dnf repolist as follows:

    # dnf repolist
    Updating Subscription Management repositories.
    repo id                                              repo name
    myupload                                            myupload
    llvm-compat-packages                         llvm-compat-packages
    rhel-9-for-x86_64-appstream-rpms                     Red Hat Enterprise Linux 9 for x86_64 - AppStream (RPMs)
    rhel-9-for-x86_64-baseos-rpms                        Red Hat Enterprise Linux 9 for x86_64 - BaseOS (RPMs)

    Try to install one of your custom packages with the following command:

    # dnf install walrus

    It will be installed from your template.

    Next steps

    By defining a content template, we can create a stable baseline for controlling patching for large groups of systems and provide custom content to those end systems.

    FAQs

    1. I do not see my systems when trying to assign a template.

      This could be due to a couple of reasons:

    • The template’s architecture or operating system version does not match the system: Double check if you used the correct options when creating the template.
    • The system was not registered to Red Hat Insights: Ensure you registered the system with rhc connect and not just subscription-manager register.
    1. I’ve assigned my template to a system but do not see custom repositories showing within dnf or yum.

      The system should automatically pick up the template at its next RHSM check-in. By default this happens every 4 hours, but you can adjust via the certCheckInterval configuration in /etc/rhsm/rhsm.conf.

      You can manually cause a system to check in by running subscription-manager refresh. You might need to run dnf repolist or perform a DNF action before updates to the /etc/yum.repos.d/redhat.repo file.

    2. Is uploaded or snapshotted content available publicly? 

      No, all repositories hosting third party content are only available to registered systems in your organization. This is protected by the certificates a system receives at registration time.

    3.  How long is snapshotted and uploaded content kept?

      Currently snapshots are stored for 12 months and then deleted, but the newest snapshot will always be kept. 

    4.  How can I upload content without using the UI?

      API information is available in the documentation. With the "Create an upload", "Upload Chunk", and "Add uploads to a repository" APIs, you can use curl, Python, or other languages to upload arbitrary RPMs.

    5.  How can I provide feedback?

      We welcome your feedback. Select the Feedback flag from the bottom right of the page. For general feedback, select Share feedback. Please include an email address if you would like to be contacted regarding your feedback. For issues, bugs, or feature requests that you would like to track long-term, select Open a support case.

    OSZAR »

    Related Posts

    • Extend Red Hat Insights client to execute custom automation

    • Detect network issues in Open vSwitch using Red Hat Insights

    • Synchronize instance tags from Amazon EC2 and Microsoft Azure with Red Hat Insights

    • How the new RHEL 9.2 improves the developer experience

    Recent Posts

    • How to run a fraud detection AI model on RHEL CVMs

    • How we use software provenance at Red Hat

    • Alternatives to creating bootc images from scratch

    • How to update OpenStack Services on OpenShift

    • How to integrate vLLM inference into your macOS and iOS apps

    What’s up next?

    Download the Advanced Linux Commands cheat sheet. You'll learn to manage applications and executables in a Linux operating system, define search criteria and query audit logs, set and monitor network access, and more.

    Get the cheat sheet
    Red Hat Developers logo LinkedIn YouTube Twitter Facebook

    Products

    • Red Hat Enterprise Linux
    • Red Hat OpenShift
    • Red Hat Ansible Automation Platform

    Build

    • Developer Sandbox
    • Developer Tools
    • Interactive Tutorials
    • API Catalog

    Quicklinks

    • Learning Resources
    • E-books
    • Cheat Sheets
    • Blog
    • Events
    • Newsletter

    Communicate

    • About us
    • Contact sales
    • Find a partner
    • Report a website issue
    • Site Status Dashboard
    • Report a security problem

    RED HAT DEVELOPER

    Build here. Go anywhere.

    We serve the builders. The problem solvers who create careers with code.

    Join us if you’re a developer, software engineer, web designer, front-end designer, UX designer, computer scientist, architect, tester, product manager, project manager or team lead.

    Sign me up

    Red Hat legal and privacy links

    • About Red Hat
    • Jobs
    • Events
    • Locations
    • Contact Red Hat
    • Red Hat Blog
    • Inclusion at Red Hat
    • Cool Stuff Store
    • Red Hat Summit

    Red Hat legal and privacy links

    • Privacy statement
    • Terms of use
    • All policies and guidelines
    • Digital accessibility

    Report a website issue

    OSZAR »