Developers constantly strive for a faster inner loop: the cycle of coding, building, and testing their container images and Kubernetes applications. Traditionally, testing a newly built image within a local Kubernetes environment often involves cumbersome steps like pushing to registries or manually loading images onto cluster nodes. This post introduces MINC (MicroShift IN Container), a new Podman Desktop extension designed to ease this process, offering a streamlined and efficient local Kubernetes experience powered by MicroShift.
The traditional route: Running OpenShift locally
For developers wanting to work with Red Hat OpenShift locally, the traditional approach generally involves tools like Red Hat OpenShift Local (formerly CodeReady Containers). While powerful, OpenShift Local typically sets up a complete OpenShift environment within a dedicated virtual machine. This can be resource-intensive, requiring significant memory and CPU, even for basic local development and testing. Managing a separate VM for your Kubernetes environment can also add a layer of complexity to your workflow.
Introducing MINC: MicroShift in a container
MINC offers a fresh perspective by providing a fully functional MicroShift cluster running inside your existing Podman Machine environment (on Windows or macOS). MicroShift itself is a lightweight Kubernetes distribution, built from the same trusted sources as Red Hat OpenShift, but designed for edge computing and smaller footprints.
The magic of MINC lies in its tight integration with Podman. Leveraging the underlying container runtime interface (CRI-O) and the image and storage management libraries shared by both Podman and Kubernetes, MINC achieves a significant efficiency boost. It operates similarly to other local Kubernetes solutions like kind or minikube in providing a lightweight cluster.
However, unlike kind and minikube, MINC avoids the extra step of pushing container images to a registry, as it directly utilizes the images already built and stored by Podman. This eliminates the overhead of a separate VM for your Kubernetes cluster, as seen with tools like OpenShift Local.
A key aspect of MINC's functionality is its shared image storage with Podman. When you build a container image using Podman, it's stored in a common directory (/var/lib/containers). MINC, running as a container, directly accesses this same storage. This eliminates the need to push images to registries or manually load them into the Kubernetes cluster.
The benefits: Speed, image reusability, and simplified local routing
The primary benefit of MINC is a significantly faster inner-loop iteration. Imagine building a container image with Podman and having it instantly available for deployment and testing within your local Kubernetes cluster: no extra steps required! This immediate availability drastically reduces the time spent waiting for image transfers and allows developers to focus on coding and validating their applications.
MINC promotes reusability of images built with Podman. You use your familiar Podman commands and workflows for building images, and these images are seamlessly recognized by your local MicroShift cluster. This consistent approach simplifies your development process and reduces friction.
Effortless local routing with OpenShift Routes: Because MINC leverages MicroShift/OpenShift, you gain access to powerful OpenShift concepts like Routes. When you create a MINC cluster, by default it will handle local network configuration using HTTP (port 80) and HTTPS (port 443) ports from your macOS or Windows development machine. MINC enables direct access to your applications exposed via OpenShift Routes using .nip.io domains.
This means that after deploying your pods, creating your services, and defining simple routes, the generated .nip.io links will be directly accessible from your local web browser without the need for manual port forwarding or complex network configurations. MINC takes care of the underlying plumbing, allowing you to focus on developing and testing your application's network accessibility as it would behave in a full OpenShift environment, all within your local playground. This simplified routing significantly streamlines the testing of your application's external endpoints.
Demo flow: Podify and Kubify with MINC
Let's walk through a quick demo showcasing the power of MINC:
Create a simple container image: We'll create a basic Nginx image serving a custom "Hello from MINC" page.
# Containerfile
FROM nginx:alpine
RUN echo "<!DOCTYPE html><html><head><title>Hello</title></head><body><h1>Hello from MINC</h1></body></html>" > /usr/share/nginx/html/index.html
Build the image with Podman: Using Podman Desktop (Images menu, then build image) or the command line, build this image and tag it as
minc/nginx:hello-world. See Figure 1.
Figure 1: Building an image from a Containerfile in Podman Desktop. # Using the CLI: podman build -f Containerfile -t minc/nginx:hello-worldVerify image availability in MicroShift: Once the image is built, it's immediately accessible within the MicroShift container's image store. You can verify this by executing the following command inside the MicroShift container (via a tool like
crictl):crictl images | grep helloYou should see your
minc/nginx:hello-worldimage listed, as shown in Figure 2.Deploy to Kubernetes: Now you can start a container from this image and then create a pod from Podman Desktop by selecting the container and clicking Create Pod (Figures 3 and 4). Open the Pod and click Deploy to Kubernetes (Figure 5). This deploys the pod to the MicroShift container (Figure 6).

Figure 3: Click on Create Pod. 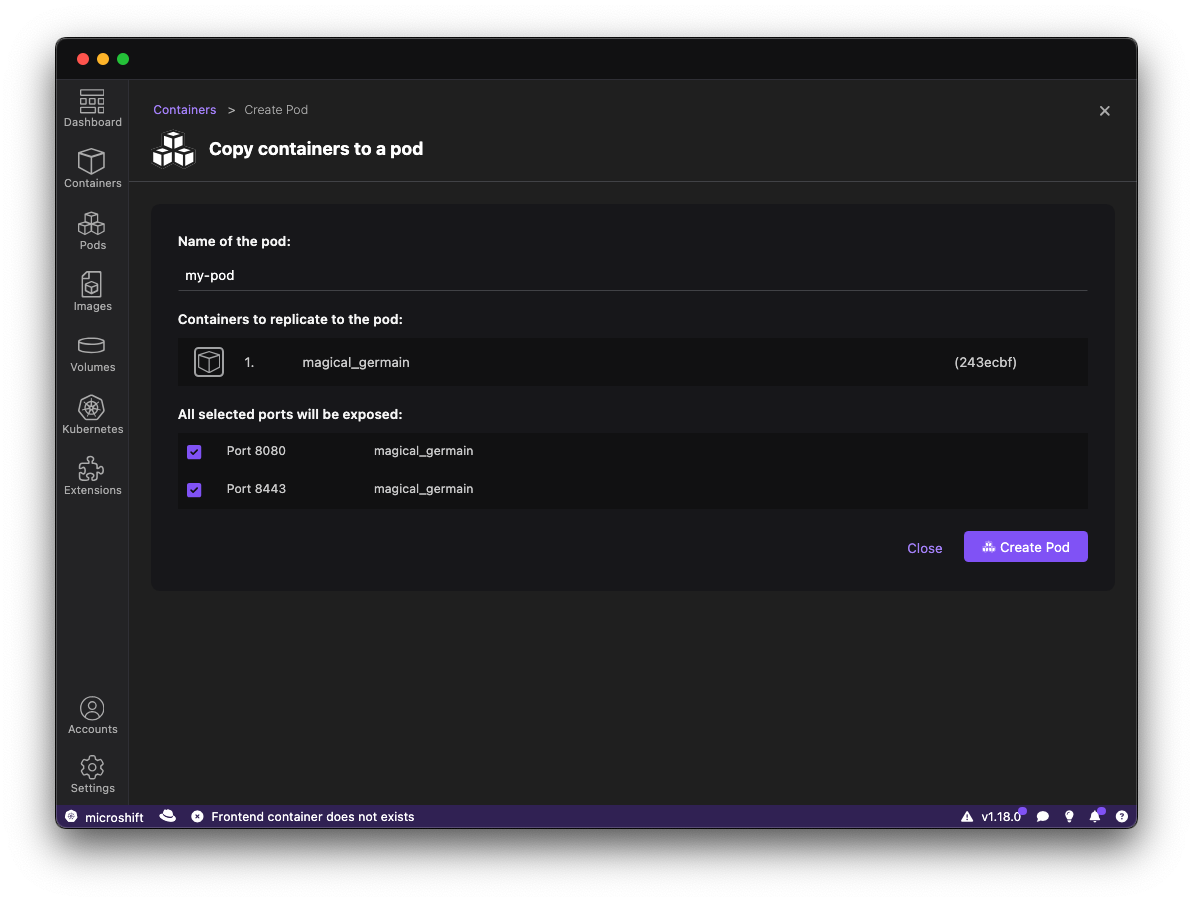
Figure 4: Copy the containers to a pod. 
Figure 5: Select Deploy to Kubernetes. 
Figure 6: Deploying the pod to Kubernetes. You could use the CLI to do the same steps:
# create the pod kubectl run hello-world-pod --image=minc/nginx:hello-world --port=80 # create the service kubectl expose pod hello-world-pod --port=80 --target-port=80 --name=hello-world-service # create the route using oc cli oc create route edge hello-world-route --service svc/hello-world-service --port 80 --wildcard-policy=None- Access your application: You can now access your "Hello from MINC" application via the exposed service or route. This demonstrates the seamless flow from building an image with Podman to running it within your local Kubernetes environment powered by MINC, without any intermediary pushing or loading steps.


Installation: Getting started with MINC
Installing the MINC extension in Podman Desktop is straightforward:
- Ensure you have Podman Desktop installed and running.
- Navigate to the Extensions view within Podman Desktop.
- Search for
MINCin the extensions marketplace (Figure 7).

- Click Install and follow the on-screen instructions.
- Once installed, you'll find a MINC card in the Resources view. Click on it and select Create new... to initiate the creation of your local MicroShift cluster (Figure 8). Note that MINC requires a rootful Podman machine. You might need to create a new machine with the rootful option if your current one is rootless.

- MINC will automatically configure your kubectl context, making it ready to interact with your new MicroShift cluster. You can verify the active context in the Podman Desktop status bar.
Video walkthrough
The following video demo showcases the MINC extension in action.
Share your feedback
The MINC extension is continuously evolving, and your feedback is invaluable! If you encounter any issues or have suggestions for improvement, please don't hesitate to share them on the Podman Desktop issue tracker. Your contributions will help make MINC an even more powerful tool for local Kubernetes development.
